Queen Anne’s Lace And A Mixed Bouquet

mixed bouquet

An Important River

Here are a couple more cyanotype prints from my field trip on Monday with my colleague Steph from Swansea University’s FIRE Lab. We walked the River Tawe path from Swansea up to Pontardawe, 15 kilometres. Swansea’s name in Welsh is Abertawe which means Mouth of the River Tawe, and Pontardawe means Bridge over the Tawe, and it’s an important river in these parts.


Queen Anne’s Lace

We took a print from a clump of gorgeous Queen Anne’s Lace (Daucus Carota) and then a mixed bouquet of wild flowers. We used a ten-minute exposure time en plein air at around 1pm on a very sunny August day and then developed the prints in cold running water. The root of Queen Anne’s Lace smells of carrot and has a very high sugar content, second only to beetroot.


The FIRE Lab

I am currently artist in residence with The Fire Lab at Swansea University and have been going on field trips with scientific colleagues along the course of The River Tawe. This cyanotype experiment is our latest field trip.


Teasels And Rubbish

Teazles


Day Of Reckoning!

Yesterday was cyanotype exposure day, today was cyanotype developing day – and the day of reckoning! So much can go wrong. Cyanotype was the earliest form of photography, invented by Sir John Herschel in 1842 to copy his notes. Anna Atkins used it to record botanical specimens and produced the first photographic book in 1843 using cyanotype. It was quickly superseded by other more reliable forms of photography but was still used to produce blueprints for engineers. Nowadays it’s very popular in fine art printmaking and alternative photography.


En Plein Air

Here are a couple of the ones I developed today alongside photos of them being done en plein air. The first is a Teasel, an ancient plant that used to be used in woollen textile manufacture and their seeds are a favourite food of the European Goldfinch. The second is some rubbish we picked up on our walk.

The FIRE Lab

I am currently artist in residence with The Fire Lab at Swansea University and have been going on field trips with scientific colleagues along the course of The River Tawe. This cyanotype experiment is our latest field trip.


Boiling Hot And Blue Prints


cyan 3

I went on a field trip alongside the River Tawe today, from Sainsburys in Swansea to Tescos in Pontardawe, about 15 kilometres. It was BOILING hot. My colleague Steph and I did some experimental cyanotype (blue prints) exposures on the way, working with plants at the side of the path, rubbish we picked up and even shadows on the tarmac. I’ll develop these in cold water tomorrow to see what we have. Fingers crossed.


ps we didn’t pick the plants, but gently bent them and they sprang back afterwards. We disposed of the rubbish responsibly.


Ethereal Sunshine Print


plants 1

Walking The Tawe Path

I’m going on a FIRE Lab field trip with a colleague tomorrow to walk the River Tawe Path, making cyanotypes along the way. It looks like the weather will be great for exposing these in the sunshine. I spent most of today preparing and I wanted to do a trial run as I haven’t done any for a while. I found some ready-prepared paper tucked away in a folder and grabbed some bits of plants from my garden. I perched the paper on my garden bench and put a sheet of glass over it and let the sun bathe it in light for 10 minutes – it was about 1pm so the light was very strong.


plants 2

Vintage Paper

The plants were quite fleshy and the glass couldn’t squash them flat and they threw slight shadows onto the treated paper, so I guessed the end image wouldn’t be the sharpest. The paper is a sheet of vintage I was given a while back, quite old and no watermark so I had no idea if it was even printmaking paper. It’s very thick and absorbent, almost like cloth. I took a photo (above) after 10 minutes exposure, before I put it in the sink to develop it.


plants 3

Soft And Shadowy

Cyanotype is developed in cold water, first in running water and then a good soak in water with a dash of vinegar added. I like the way this one has turned out – the combination of the soft creamy paper and the shadowy images gives it an ethereal quality.

A Gig On #Caturday

omnichron 3


Husb and I just got back from a gig at Cinema & Co with the fabulous psychedelic band Omnichron. Of course, I had to have a scribble.


Here’s a lovely song for #Caturday  by Omnichron – it’s about a cat called Marmalade…


Yellow Stone Blue Sheep


August Tawe source

Husb and I had a couple of days away in mid-Wales and drove back along the old unnamed road between Trecastell and Tafarn-y-Garreg in the Brecon Beacons where we stopped near the source of the River Tawe. We only had time for a short walk so we followed a dry stream bed down the hill and came across patches of bright yellowy brown. There were two types, one a fairly hard stone and the other a softer, crumbly clay. I left a coin in exchange – just in case there’s one of the Gwragedd Annwn thereabouts – and brought them home to try and make usable pigments with them.

That’s my weekend sorted! I’ll link this with my work in the FIRE Lab at Swansea University.

blue sheep

And then we saw some bright blue sheep!


Preparing For A Blue Day

I’m preparing for a cyanotype field trip over the bank holiday. The idea is to take out prepared cyanotype papers into the landscape and make photograms from what we find. Here are some I did a while back …


developing


Make Your Own Pocket Watercolour Paintbox

box 4

I did a blog recently about a little watercolour paintbox I made from an old tin. Lots of people were interested so I thought I’d put up instructions for it. I do a few hours teaching each week for a charity working with homeless people and I did this with the people in our watercolour group, so they each have their own kit.

You’ll need:

  • A small rectangular hinged tin – I used a vintage ink stamp tin
  • A watercolour brush
  • A junior hacksaw
  • Sandpaper
  • DAS self-hardening clay
  • An Inhaler or large round-bottomed pen
  • A plastic lid from a margarine tub, or similar
  • Blu Tack
  • White acrylic paint
  • A hog hair brush or similar
  • Some reasonable quality tubes of watercolour paint


  1. Clean and dry the tin
  2. Cut a watercolour brush to size with a junior hacksaw
  3. Sand off the cut top with sand paper
  4. Press self-hardening clay evenly into the deeper (bottom) side, smoothing it up the sides a bit to seal it.
  5. Make a channel with the cut brush in the centre of the clay.

box 1

6. Press six dips with the bottom of a pen, such as a Sharpie or an Inhaler. The dips should not go to the bottom.

box 2

7. Leave the clay to dry – it might take a few days

8. Cut the white plastic to fit the lid and press it in. A smidgen of blue tack or similar might be needed.

9. If you’ve used coloured clay, give it two coats of white acrylic paint, leaving it to dry between coats.

box 3

10. Blob some good quality watercolours into the dips – one each of red, yellow and blue; purple, orange and green and leave them to dry before you carry the tin around. Pop the brush in and off you go.

box 5

Have a great time with it …..

Time Off

I didn’t do anything arty today, I’ve had a day off to relax a bit. I did some baking …. vegan coconut macaroons which didn’t quite work out. They taste nice but they don’t have the gooiness that condensed milk gives the traditional ones.

coconut macaroons

And a tarte tatin with cooking apples from our allotment and glazed with apple and rosemary jelly made by a friend. I made a sweet pastry and tossed the quartered apples in a lemon syrup before putting them into the tin. I bake tarte tatin in a smallish cast iron frying pan I’ve had for many years.

tarte tatin


My Geographic Palette #5 – Australian Ochre

ochre 9

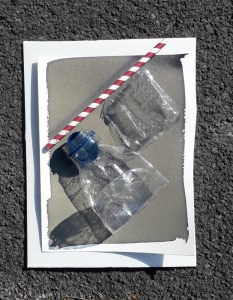
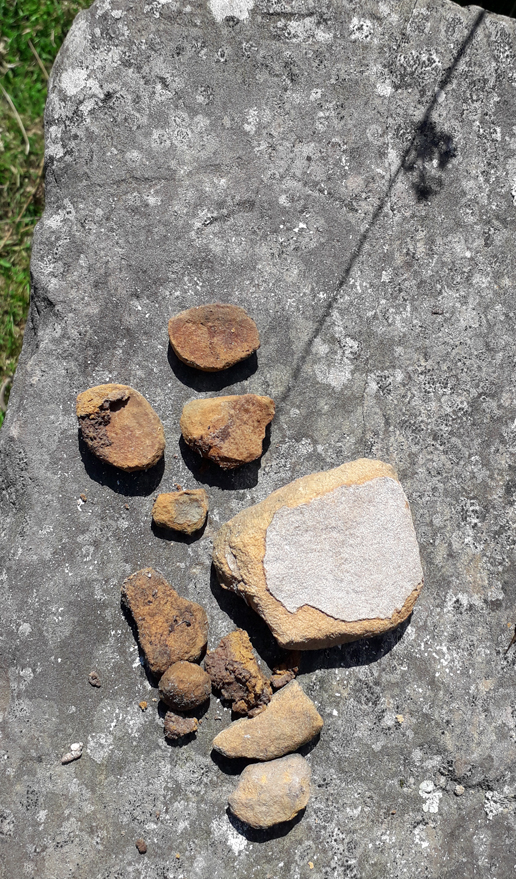
This Australian Ochre is the fifth pigment I’m trying out from my geographic palette – plants and minerals from different places that I’m converting into paint and/or ink. I’m using them to develop work that I’m doing with Swansea University’s FIRE Lab project, which brings together science and the arts to do research and engagement along Swansea’s River Tawe. The ochre is in the little bag at the bottom of the picture.
equipment


I was very moved to be gifted this Australian ochre which was collected by Aunty Anna Duncan, a Gomeroi/Kamilaroi artist. She gave the ochre to researcher Emily O’Gorman to bring to Swansea and collected it from a dry river bed near Terri Hei Hei (part of her Country) in north-western New South Wales, a special area that includes very old grinding grooves near a long-dry creek, a birthing tree, some grave sites, and a colonial-Aboriginal mission. Aunty Anna collected the ochre in the traditional way to ensure that it is spiritually safe. I am honoured to receive it and excited to use it.


I put a couple of the smaller fragments into a small pestle and mortar (bought in Pakistan and marble I think) and crushed them – they are much harder than I was expecting and there was a lot of grit in the powder at the end which I think was the marble not the ochre!!!


I looked up some tips for how to turn it into paint – traditionally it is ground up and mixed with spittle or blood, but I decided to adapt a recipe for printing ink from Shannon Yost and added some gin and water to the powder, mixing it well. Then I mixed in a dob of Japanese Nori paste, which is made from seaweed. Finally, I put some of the rather stiff mixture into a small pot and added more water to make it thin enough to use with a brush.


ochre 7

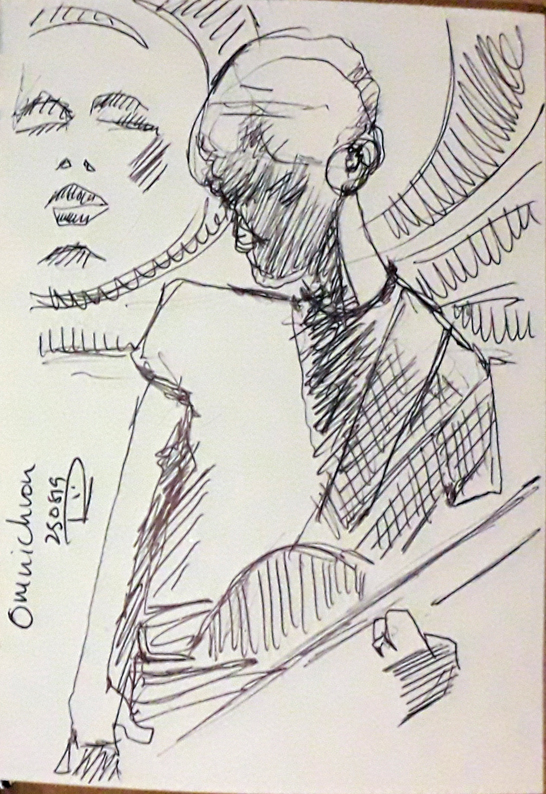
I did a quick brushwork sketch based on some sketchbook drawings inspired by culverts I had visited in the Brecon Beacons a few weeks ago with colleagues in the FIRE Lab team. It worked beautifully – the pigment is thin enough to flow but thick enough to hold the brushstrokes and give a wide variation of density and colour. Well chuffed. I used a Langdon watercolour paper, 300 gsm and quite heavily textured.


Here’s a link to one of the FIRE Lab blogs – this is about a regular Twitter game about Dams.